Installation guide
Introduction
This guide describes in steps how to prepare for and deploy a new or upgrade an existing OTH installation.
It is highly recommended to have read the OTH Platform operations guide.
Deployment Pre-requisite
The following key items must be satisfied before any meaningful deployment of an OTH environment can proceed.
Ansible capable workstation
A computer in the form of a workstation, laptop, a server or similar with ansible version 2.12 or newer and ansible-vault (optional) installed.
The computer must have SSH access to the nodes the OTH installation are to be deployed to and the SSH user must have privileged access.
AWS users can with benefit use AWS SSM for SSH access.
Infrastructure
A suitable infrastructure as described in the OTH Platform operations guide, consisting of network, nodes, a database, rabbitMQ and object-storage endpoint. The nodes must be accessible by a privileged user.
Notice
Notice
Deployment configuration files
A set of configuration files describing nodes, features, services and other settings are needed for a deployment. See Configuration section below for details.
Credentials
A set of AWS credentials (access key and secret) to pull OTH container images, provided by the OTH technical support.
A set of credentials for accessing the object-storage endpoint (not provided by OTH).
Firebase/APNS credentials (optional). These should be changed with your own credentials if you are running your own developed android and/or IOS apps.
Branding (optional)
Any white-label branding following the specifications described in the OTH branding guide, must be submitted to and accepted by OTH beforehand, through the OTH support channel.
Configuration
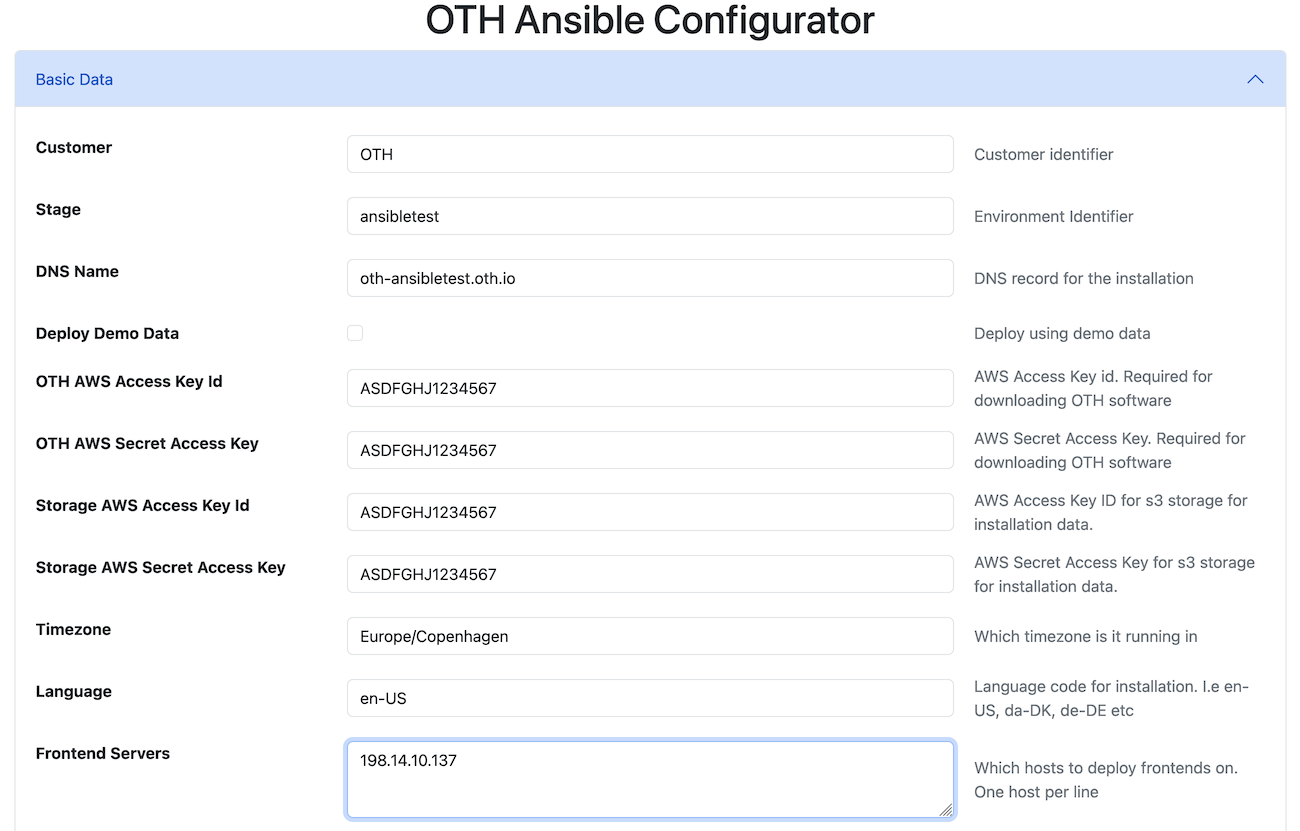
The OTH support provides a configuration web tool along with the AWS credentials, for ease of setting up a configuration for use during the deployment process.
Configuration files
The OTH-ansible playbook need the following set of configuration files to deploy successfully :
inventory.yml:
The inventory file contains nodes reference to where the solution will be deployed to and basic configuration like timezone, platform URL and other needed variables.
authentication.yml:
The authentication file contains IDP keys and secrets for each relevant service. This file should be protected and it is recommended to encrypt this file with ansible-vault. Do not share this file with non-trusted parties.
settings.yml:
The settings files describes all configuration for the OTH platform.
Create a set of configuration files with the OTH web configurator
Navigate to : https://ansiblecfg.oth.io and login with the Ansible configuration Generator credentials provided by the OTH support to start the configuration wizard.
Notice
Fill out all relevant information and download the configuration files.
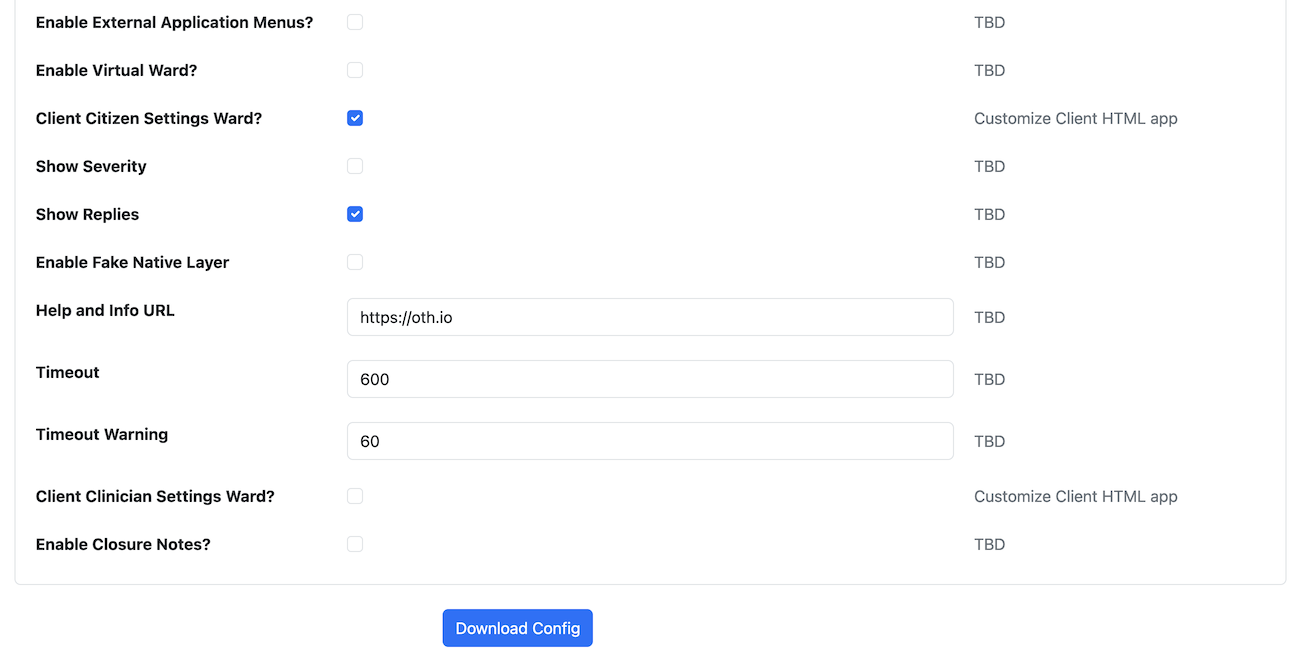
Please refer to the FEATURES_AND_SERVICES.md and INVENTORY_AND_VARIABLES.md for a detailed description of each configuration option.
Deployment
This is a step-by-step example of how to deploy a OTH solution.
Notice
Prepare working directory, configuration and playbook
Create a working directory of choice on your deployment computer and change to this working directory :
mkdir ~/myothsolution
cd ~/myothsolution
Create a configuration directory and cd into it :
mkdir release28600
cd release28600
Create a requirements.yml specifying preferred release as specified by the OTH technical team or refer to latest requirements build versions here https://public.oth.io/ansible/oth-ansible-playbook/28600/requirements/
---
collections:
  - source: "https://public.oth.io/software/ansible/oth-core/2.86.0/oth-core-2.86.0+build2.tar.gz"
    version: "2.86.0+build2"
    type: url
Place your authentication.yml, inventory.yml and settings.yml in ~/myothsolution/release28600.
Deploy full OTH installation
Deploy a full solution (load-balancer (front-end), application server, storage server) :
Notice
Always install the collection specified in the requirements.yml before running the playbook
cd ~/myothsolution/release28600
ansible-galaxy collection install -r requirements.yml -f
run the playbook
ansible-playbook oth.core.all -i inventory.yml
Notice
ansible-playbook oth.core.all -i inventory.yml --ask-vault-pass
Deploy a specific node
This is how you deploy a specific node (e.g. Application server only) :
ansible-playbook oth.core.applicationservers -i inventory.yml
Valid targets are oth.core.applicationservers, oth.core.loadbalancer, oth.core.storageservers or oth.core.all.
Setup DNS
For new installations, last step is to point the FQDN (installation_url) to the IP address of the load-balancer node.
Test
After a successful deployment and when the FQDN (eg. oth-ansibletest.oth.io) points to the load-balancer, you should be able to navigate to (in this example) https://oth-ansibletest.oth.io and login to the clinician portal.
Notice
If you are upgrading, the first startup after an upgrade can take longer, due to running migration-scripts.
Miscellaneous
Using ansible with AWS SSM
The OTH ansible playbook is written to a common deployment base, which is capable of handling on-premise deployment, but which can also be used in a cloud environment. The ansible playbook requires access using SSH currently, and OTH recognizes, that this might not be entirely possible for AWS deployments, as customers might not have established a bastion host setup, or a similar VPN infrastructure.
For these case on AWS, OTH advises to use to AWS Session Manager to gain access. The Terraform module provided by OTH, enables the Session Manager on the provisioned ec2 nodes.
To set that op, operators should locally install the AWS Session Manager plugin, as outlined here: https://docs.aws.amazon.com/systems-manager/latest/userguide/session-manager-working-with-install-plugin.html
Add these tidbits to the users SSH configuration, first for instances UUIDs
host i-*
    ProxyCommand sh -c "aws ssm start-session --target %h --document-name AWS-StartSSHSession --parameters 'portNumber=%p'"
A more human-readable option can be chosen using internal DMZ zone for VPC like so:
Host *.<vpc domain>
ProxyCommand aws ssm start-session --target $(aws ec2 describe-instances --filter "Name=tag:Name,Values=%h" --query "Reservations[].Instances[?State.Name == 'running'].InstanceId[]" --output text) --document-name AWS-StartSSHSession --parameters portNumber=%p
This can be handled in using an inventory such as:
all:
  children:
    applicationservers:
      hosts:
        i-<uuid>:
    storageservers:
      hosts:
        i-<uuid>:
Then add the DNS names of application servers to the load-balancer (add to settings.yml)
loadbalancer:
  dedicated: true
  backends:
  - <dns names of OTH backends>
  tls:
    enabled: true
    cert_file: <path to combined TLS certificate>
    cert_file_name: oth.pem
Recommandations for upgrading an OTH installation
Even though it is possible to deploy a new release to an existing running installation, we recommend that you follow this procedure :
- Deploy a new empty application node on the same network as the running application node.
- Plan a service window for deployment.
- Stop old application server (either stop all OTH services or shutdown the node).
- Backup/snapshot your storage server and/or your own database, object-storage and rabbitMQ services.
- Change hosts reference for application server in your
inventory.ymlto point to the new node. - Deploy new release to the new application node.
- Redeploy the load-balancer node (needed for pointing to new application server).
Notice
Further reading
Further details on administration and operation of the OTH solution can be found in the OTH Platform operations guide.